Promotional Products
GUIDE TO PRINTING FROM KORTEXT
PLEASE NOTE – When you have selected Print from the Kortext reader, if you cancel print at this stage, it will still decrease from your allowance so please make sure you are ready to print. Limits on the print are set by the publisher and are shown when you click the print icon.
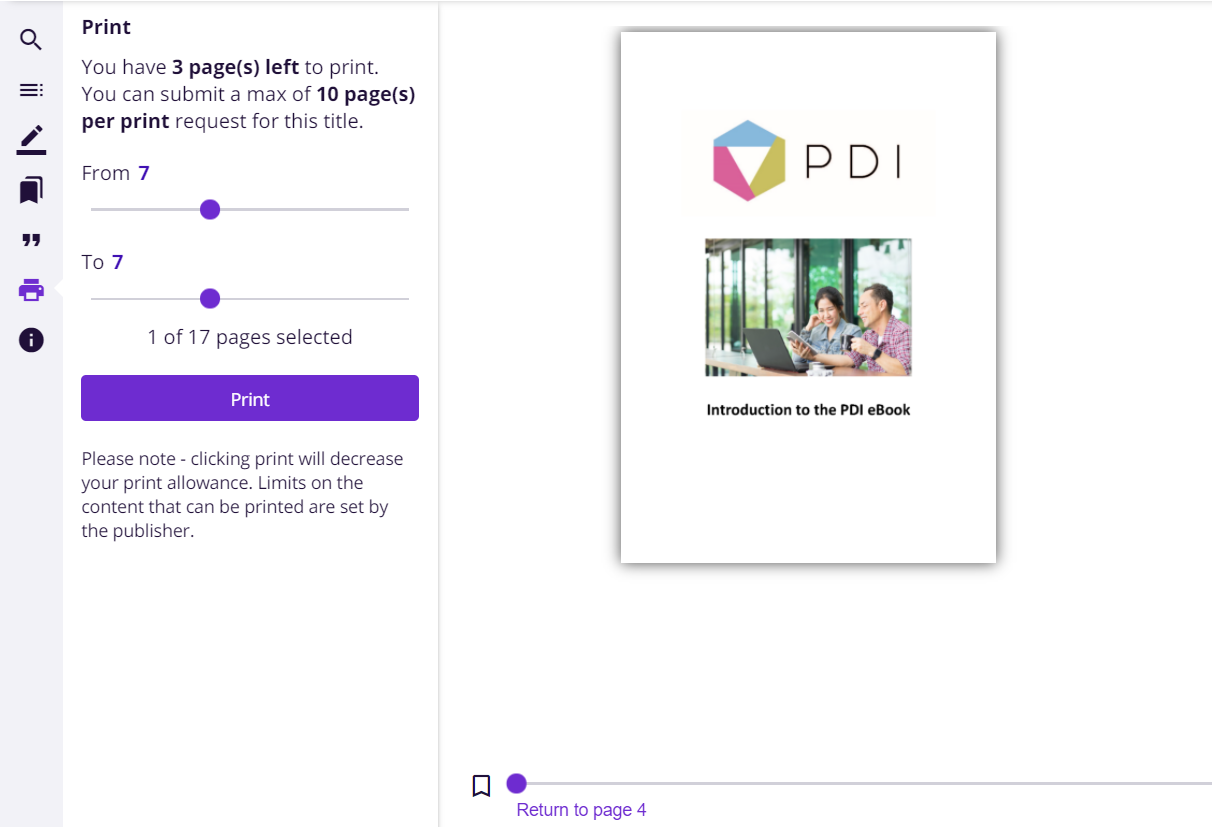
After clicking the ‘print’ option on the left hand side of the screen, select which pages you wish to print by moving the ‘from’ and ‘to’ sliders accordingly. In the example below, we have chosen to only print one page, page 7.
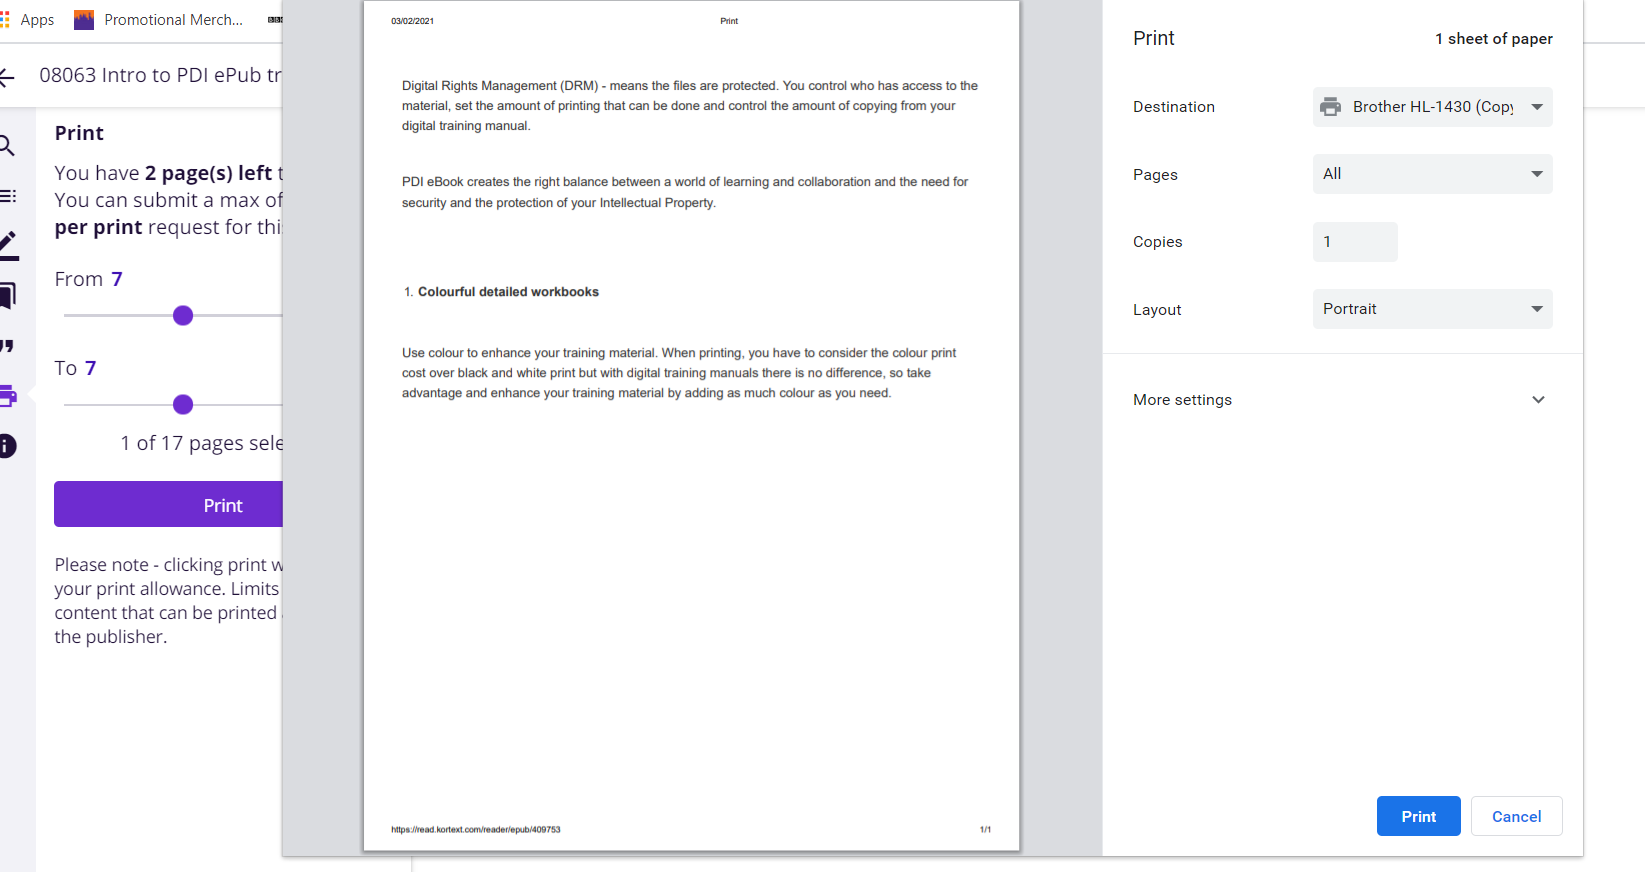
When you click the print button in Kortext, your device will open your actual printer settings, as with any other document you might be printing. You need to keep the ‘Pages’ as ‘All’, this means it will print the one page you have selected above, and then press print on your device printer settings. If you had moved the slider to, say from 1 to 9, kept the Pages as All, ten pages would be selected for printing.
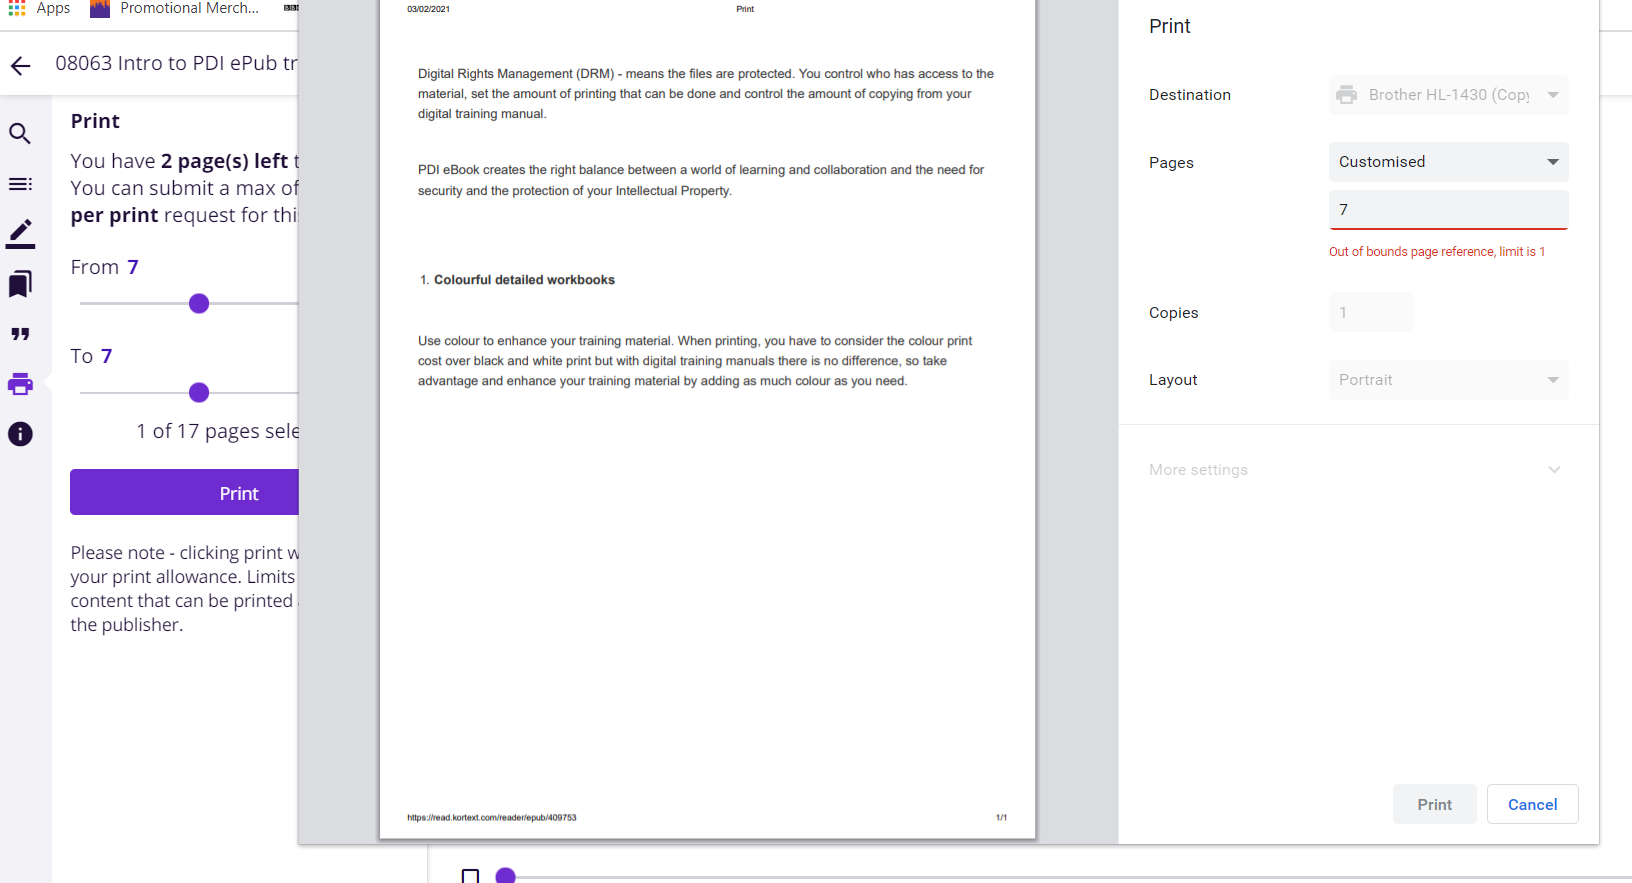
However, if you change the ‘Pages’ to ‘Custom’, and change to the actual page number, i.e. 7, the printer settings are expecting 7 pages to be printed, but you have only selected one page, as above. Therefore, you will get an ‘out of bounds…’ message.
There are some great video tutorials here which give you hints and tips on using the eBooks - https://www.kortext.com/support/ - where you can make notes, highlight and personalise your viewing preferences. You can also view your eBook and make notes etc. to it offline through the Kortext app, which will then sync with your bookshelf when you go back online. The following link may also assist with your Kortext Reader experience - https://www.kortext.com/accessibility/.
Hopefully, following the above will enable you to print as you expect. If you do have any further issues, please do contact support@pdi.co.uk